Well, alongside getting stuff done, it occurred to me that, having mainly played Warmahordes for the last few years, I have almost exclusively been using 2d terrain. Now, don't get me wrong, it is ideal for a precise and competitive wargame such as Warmachine, but, for someone that mainly became involved in the hobby due to the aesthetics, it lacks a certain visual imagery. There are multiple sets of very nice mouse mat style 2d terrain packs available, but for my own events, I was using mdf shapes, colour primed, with a basic outline of terrain on it, alongside the text denoting what it was. Fit for purpose, and functional, especially when you have a number of tables to set up, but just not visually appealing to the casual passer-by.
So, I figured it was time to add some scenery to my collection. By that, I mean painted stuff, not hidden boxes of untouched plastic and resin.
Way back in the mists of time (the late 80's, for the uninitiated) terrain was either scratch built or repurposed from model railway stores. The issue there is that, the former tends to look rubbish when you don't really know what you are doing, and the latter seems like a bad idea when you have limited funds and those are earmarked for more shiny models. I'm sure most people of a certain age will remember water towers made from old bean tins or juice cans (and flying tanks made from deodorant bottles. SURE you do...) and slightly later than that, good old Games Workshop, in their big box games (2nd edition 40k, 4th edition WHFB) started putting out card-stock buildings, and more followed in various expansions and in the pages of White Dwarf.
 |
| Nevermind 2D terrain, 2D models used to be a thing... |
Whilst relatively simple to put together, they suffered the problems of being all shiny, and well, flat looking. Yeah, there were ways to emboss them, car mesh for leaded windows, matchstick windowsills and so on, but, nothing like the stuff that was appearing in magazines, that people who had much more experience than my 9 year old self could manage... We made do with them back then, it's not like they looked out of place alongside the massed ranks of unpainted or primed troops.
So, fast forward over the years, and it was still the same, despite hard plastic terrain appearing, and really taking battlefields to the next level, the funds almost always went towards filling the lead pile, rather than enhancing the battlefield. That's not to say that I didn't buy any terrain, just that, like the majority of the backlog, I didn't do anything with it.
The last few days ( gets there eventually by way of a huge ramble) I grabbed the Tiny World's Rocky Outcrops Resin Scenery Set that I had had lying about for a number of years and set to work, figuring, I've painted numerous Wolds for my Circle Orboros army, rocks are obviously the easiest and quickest place to start. Despite being scaled purely for 15mm, I also grabbed the remains of the Copplestone Casting's Hidden Lairs pack that I had used for my Hordes of the Things Stronghold..
 | ||

There are 8 pieces in the Tiny World's set, although, I originally only found 7 of them, and had to quickly go back and paint up the last one, luckily they had already been washed, sanded and primed.
So, how did I go about it? Basic technique is (all colours are Army Painter)
1. After washing and sanding, prime with Uniform Grey.
2. Paint earth areas Leather Brown.
3. Cover entire thing with Strong Tone wash.
4. Over/drybrush rock with Uniform Grey.
5. Drybrush rock with Ash Grey.
6. Over/drybrush earth with Leather Brown.
7. Drybrush entire thing with Skeleton Bone.
8. Apply Anti-shine Matt Varnish (I brushed it on, but you could easily spray it)
With that, the rocky outcrops are pretty much done, it isn't time or labour intensive, and only requires some basic work to really improve the final look.
I use a combination of mininatur/siflor grass tufts and mossy patches, alongside 2 shades of clump foliage that I picked up in a model railway store to finish off the pieces, using the colours that correspond to the majority of my painted models.
 |
| The Rock of (not) Ages. |
 |
| Not sure if I'd rather have based them up, rather than being stand alone. |
And that, is basically it. I used to do a more detailed process of painting rock, involving various green washes, but I didn't really think it was necessary here, this was essentially just a quick project between other ones. One thing I have been asked about is using Bone to drybrush the rocks, and I've found that, in combination with the Strong wash, it adds a more natural look to them, and avoids the harsh contrast of a dark wash and just grey drybrushing.
Final thoughts on this little side project is that, mostly being devoid of skulls (mentioning no names) these pieces are scale agnostic, and I can see myself getting use out of them with my 6mm, 15m and 28-30mm figures. The Copplestone pieces will probably be limited to 6-15mm gaming, as a 15mm Human skull is probably a good 6mm Ogre skull. The smaller pieces will provide basic cover and obstructions at larger scales, and should prove to be impassable areas when I go down to 6mm. I've added a number of images for scale with 6mm, 15mm and a couple of various sizes of 30mm scale figures for comparison.
 |
| 6mm Beastmen (Microworld Games) - 15mm Picts (Copplestone Castings) |
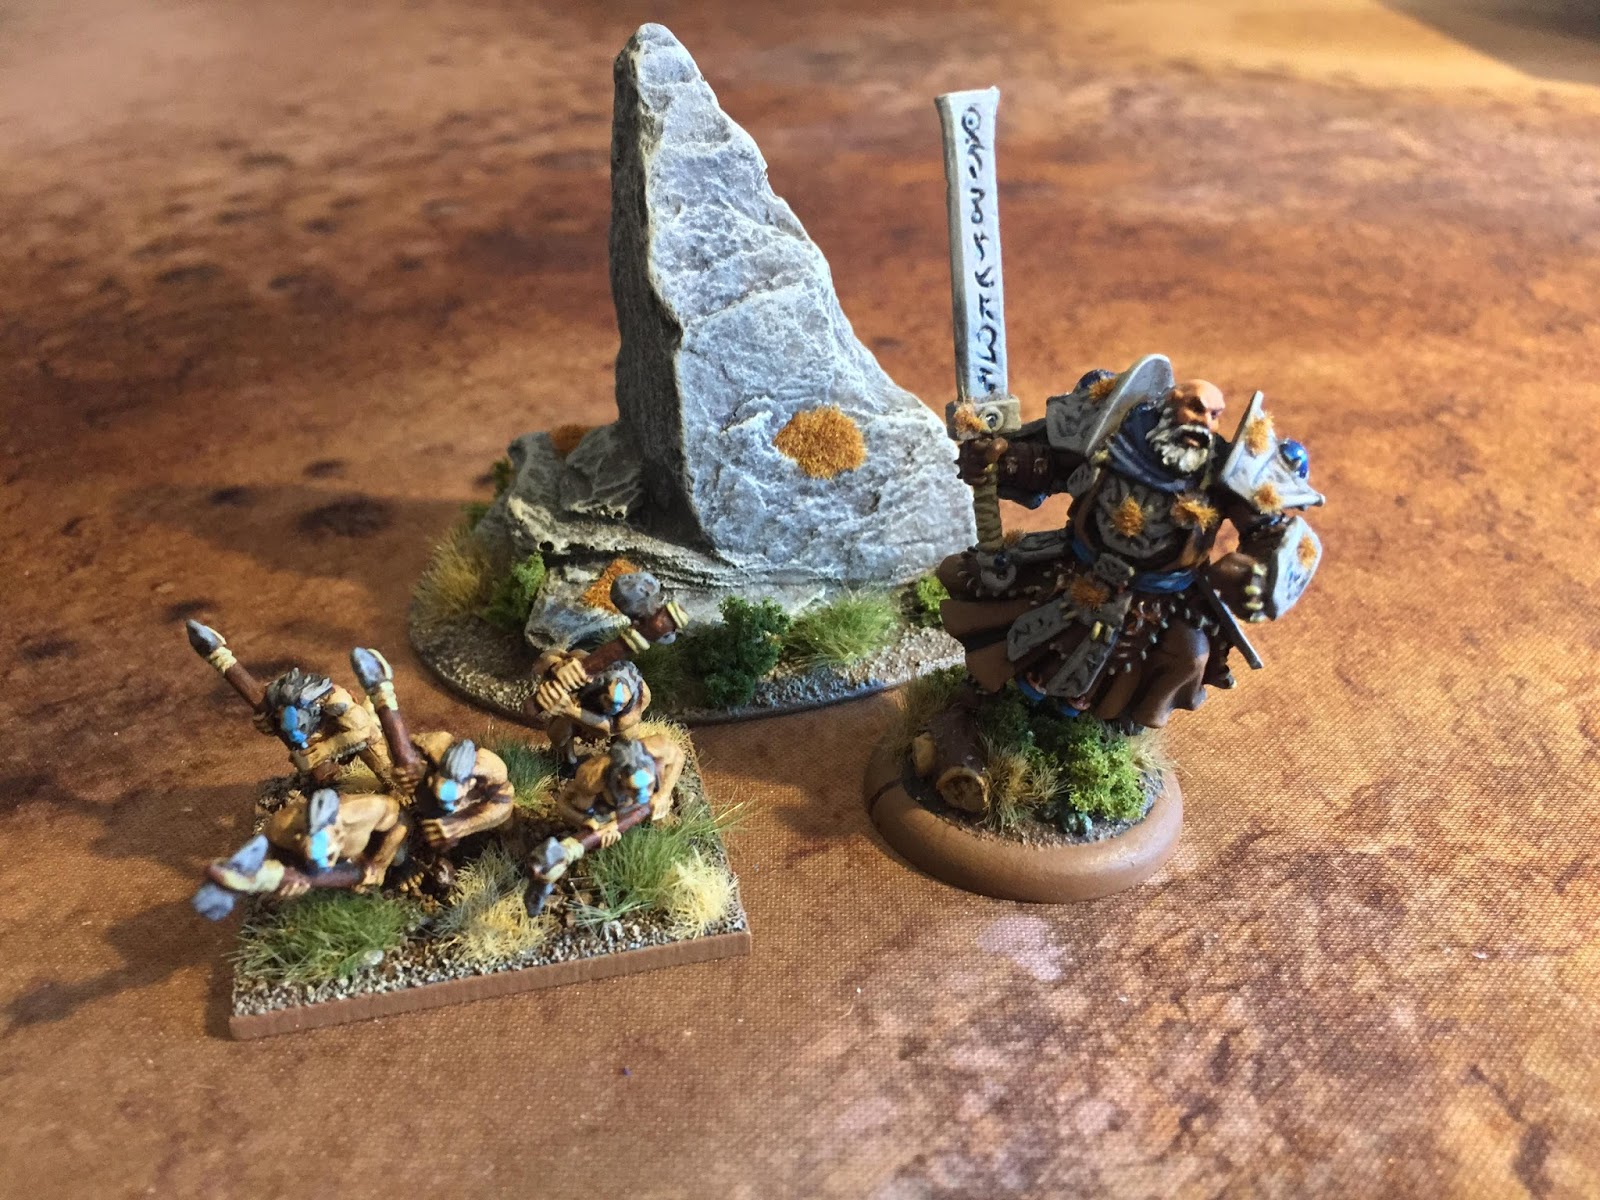 |
| 15mm Picts - 30mm Baldur the Stonesoul (Privateer Press) |
 |
| Megalith (50mm base) - Baldur (30mm base) |
 |
| Large Cave or Tunnel Entrance? |


 |
| Savage badgers around here... |
So, that's it really, just a little distraction for myself between projects that has given me a number of scenery pieces to kickstart my collection (of painted stuff), and they are generic enough that I can see myself using them for multiple game systems. As little more than giant rocks, they will fit in with both fantastic and historical games, and will break up the flat expanse of table. It is definitely a project that anyone could attempt, and, even if you don't want to spring for resin pieces, you could get a very similar result with rocks out the garden stuck in some polyfilla. Oh, we are back to the late 80's again...
It would be remiss of me to only have one stone based pun in this article considering the amount of typing, so I'll leave you with the words of Primal Scream frontman Bobby Gillespie -
"Get yer rocks off, get yer rocks off honey, paint 'em now-now, get 'em on the table*"
Cheers Bobby, obviously advocating getting that terrain painted since 1994.
*editted for effect. Obviously.
Nice work indeed, John. Can't beat a load of scatter terrain for versatility. Have a few pieces myself, some even from Tiny Worlds, amongst other brands, and some scratch built using various left-over materials. Personally, if I had to choose which aspect of the modelling/painting side of our hobby I prefer the most it would be scratch terrain building over my awkward attempts at figure painting!
ReplyDeleteCheers Tim, yeah, terrain has never been my forte... although, I did do a nice bit for Mantic using a fairy plant pot foot. I have another one left over from the pack, might see if I can do another for myself.
DeleteThey look great!
ReplyDeleteCheers Simon :)
Delete